| ||
|
The Inventory Editor screen is where you will enter all your vehicle information. The screen consists of four tabs as outlined below:
The "General" tab is where you will view or edit the general information about your inventory records. Once a record has been added from the Inventory Records screen simply fill in the fields here to complete the record. After you have done this, you can track different information about the record on the other tabs. 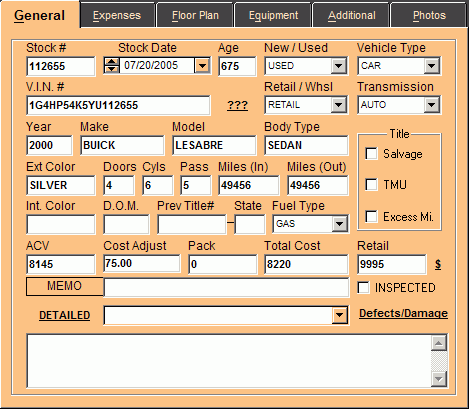
The "Expenses" tab is used to track all expenses and cost adjustments to your inventory. As you make credit and debit entries the running total is tracked and posted in the "Cost Adjust" field on the General tab. To add an entry click the "Add Expense" button and fill in the fields directly in the grid list. To delete an entry, simply highlight the row in the grid and click the "Delete" button. 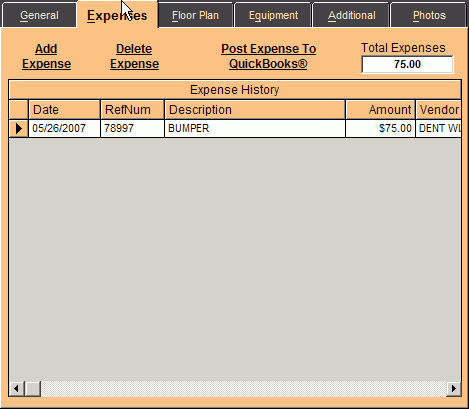 The "Floor Plan" tab is used to track floor plan expenses. Simply choose a floor plan company from the drop down combo and indicate the "Floor Date", the "Balance Date" and the "Original Floor Amt". When principal payments are made click the "Adjust Balance" button to post them. The system will automatically keep track of the estimated finance charges and even remind you when the balance is due (see Reminders ). 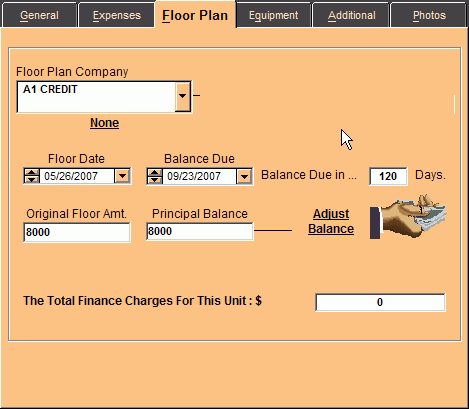
The "Equipment" tab is where you will indicate any standard or optional features for the current inventory record. This comes in handy if you plan to take advantage of our money saving Window Sticker program. Tracking vehicle equipment is also very important if you plan on exporting vehicle data to one of our integrated automotive websites (see My Website ) or to a third party vendor such as AutoTrader® (see Inventory Exporter ). 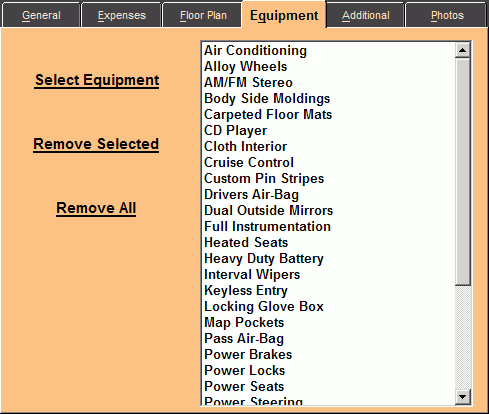
The "Additional" tab is where you will keep track of information pertaining to the current vehicles acquisition and disposition. This provides you with a centralized location where you can see where a vehicle came from and where it went. 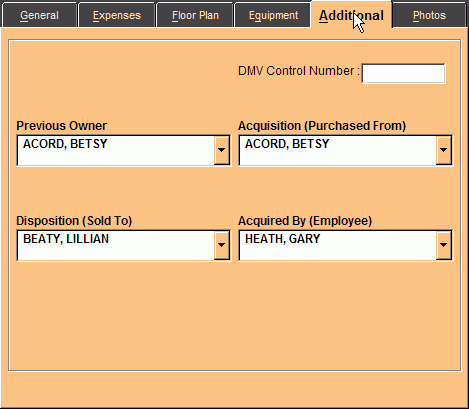
The "Photos" tab is used to link digital photos to your vehicles. There is no limit to the number a pictures that can be linked to each vehicle. To add photos click the "Add New Images" button and browse to them. This feature is especially useful for users who wish to export their inventory and photos to one of our Integrated Automotive Websites or even a third party vendor (see Inventory Exporter ). 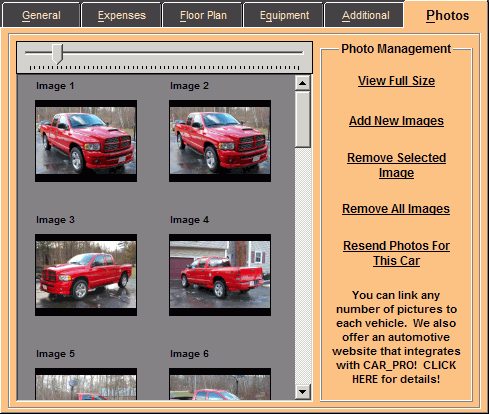
|