| Deal Editor | See Also |

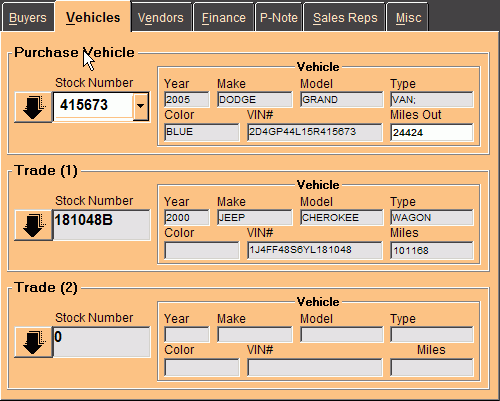
The "Vehicles" tab will hold all the information about the sold unit and trade-ins for your deals. You can link the sold unit to the deal by entering a stock number in the drop down list field of the Purchase Vehicle section or add a new inventory record to the deal by clicking the top large black arrow button. To add a trade-in click the black arrow button next to the stock number field of the Trade(1) section. After you have completed linking the sold unit to the deal and have added any trade-ins, click the "Vendors" tab to proceed to the next step.
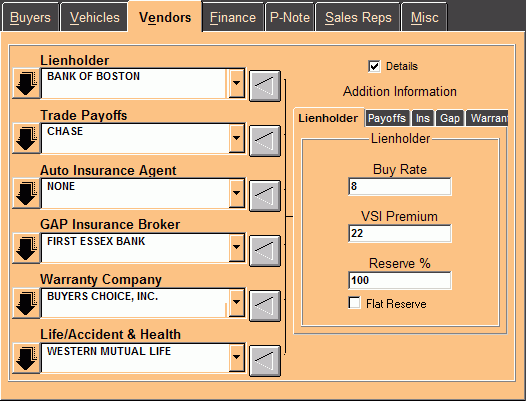
The "Vendors" tab is where you will link all the various vendors to the deal. Use the drop down combos to select each vendor that should be associated with the deal. As each combo gains focus the fields to the right will change to coincide with the active vendor type. Once a vendor has been selected the record can be edited by clicking on the large black arrow button to the left of the vendor combo. After all the vendors are linked to the deal click the "Finance" tab to proceed.
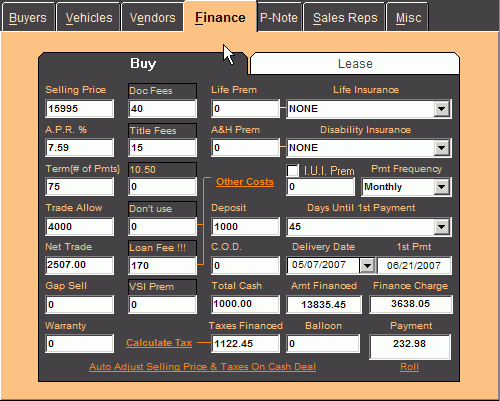
The "Finance" tab has 2 sub tabs, "Buy" and "Lease". This is the "Buy" tab and it is here that you will calculate the finance payments or enter the numbers for a cash transaction. On financed deals you will notice that as soon as the system has enough data to calculate a payment it will do so automatically. To include life and/or disability insurance in your payment, simply choose an insurance option from the Insurance Coverage drop down combos. To calculate a lease payment click the "Lease" tab. Once you have entered all of the numbers, click on the "P-Note" tab to move on to the next step.
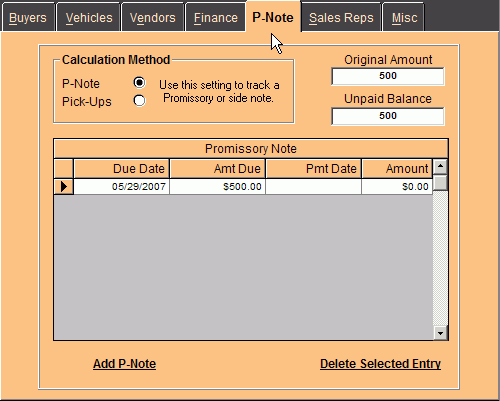
The "P-Notes" tab is used to track Pick-up Payments or P-Notes and the repayment of them. Simply indicate the "Original Amount" and click the "Add P-Note" button to store the repayment due dates. The system will remind you of these due dates on the "Reminders" screen. As you receive payments on the note, you can enter the payment date and amount in the appropriate row of the "Payment History" grid list. Next click the "Sales Reps" tab to go to the next step.
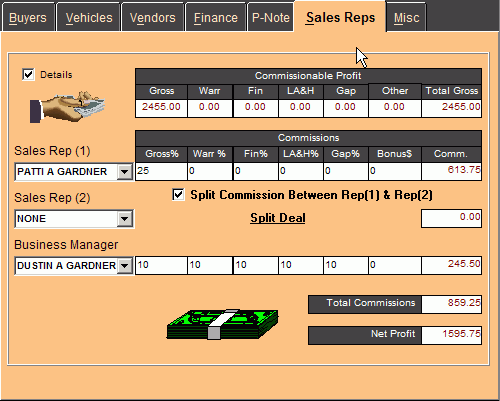
The "Sales Reps" tab is where you will link your sales reps to the deal. You can link 2 separate sales reps and one business manager. Use the drop down combos to select employees and their default commission percentages will be loaded as they were stored on the System Data screen. As you select each rep the commissions will automatically be calculated. After indicating the sales reps, click the "Misc" tab to complete the deal storage process.
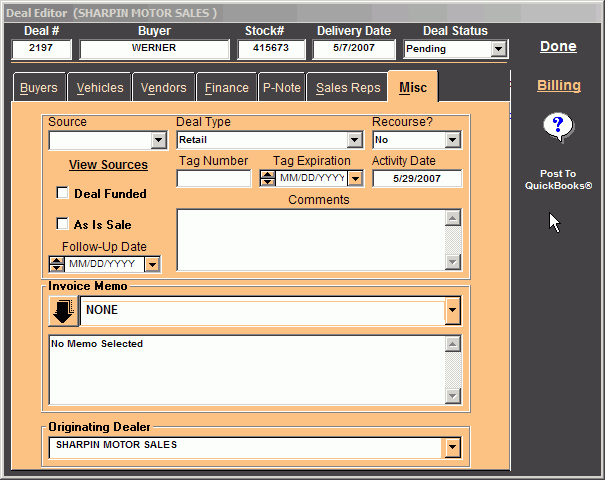
The "Misc" tab is where you will indicate whether the deal is "Retail" or "Wholesale", "Recourse" or "Non-Recourse" and whether or not the deal is "As-Is". The "Deal Status" drop down combo indicates whether the deal is "Pending" or "Delivered". You can also used it to convert deal back and forth between the two statuses. It is here that you can also indicate a follow-up date and post comments. You can also specify an Invoice Memo, which will print on you invoice or bill of sale. This feature is only useful if you use an invoice that is designed with a blank area specifically for this. If you need more information on how to obtain this type of invoice or bill of sale, simply contact us for details.
Also note that once you are on the "Misc" tab the "Billing" button is now visible. Click it to go directly to the Billing screen where you can print all your forms.